Excel files are amazing for representing data and working with data… except for showing timetables. I’ve been busy with uni the last few months and this is one of the problems I’ve faced.
We have a timetable that is in an Excel file which can be accessed by a link. I had to open it every time I wanted to see my schedule. Since Microsoft 365 is very fast (takes at least 10s to load on a 300mbps connection), It didn’t take long for me to get annoyed. The fact that it keeps changing almost weekly - doesn’t allow me to download the file locally and call it a day.
I had 0 project ideas to work on so I thought, “Why not write a script to sync the Excel timetable to my Google Calendar?” I’ve been using Google Calendar for a while now, and that would be a huge productivity boost.
After about 1 or 2 days of work, I had a working script. It was pretty satisfying to see it work as expected.
Here’s a simple comparison on how it was before and how it is now.
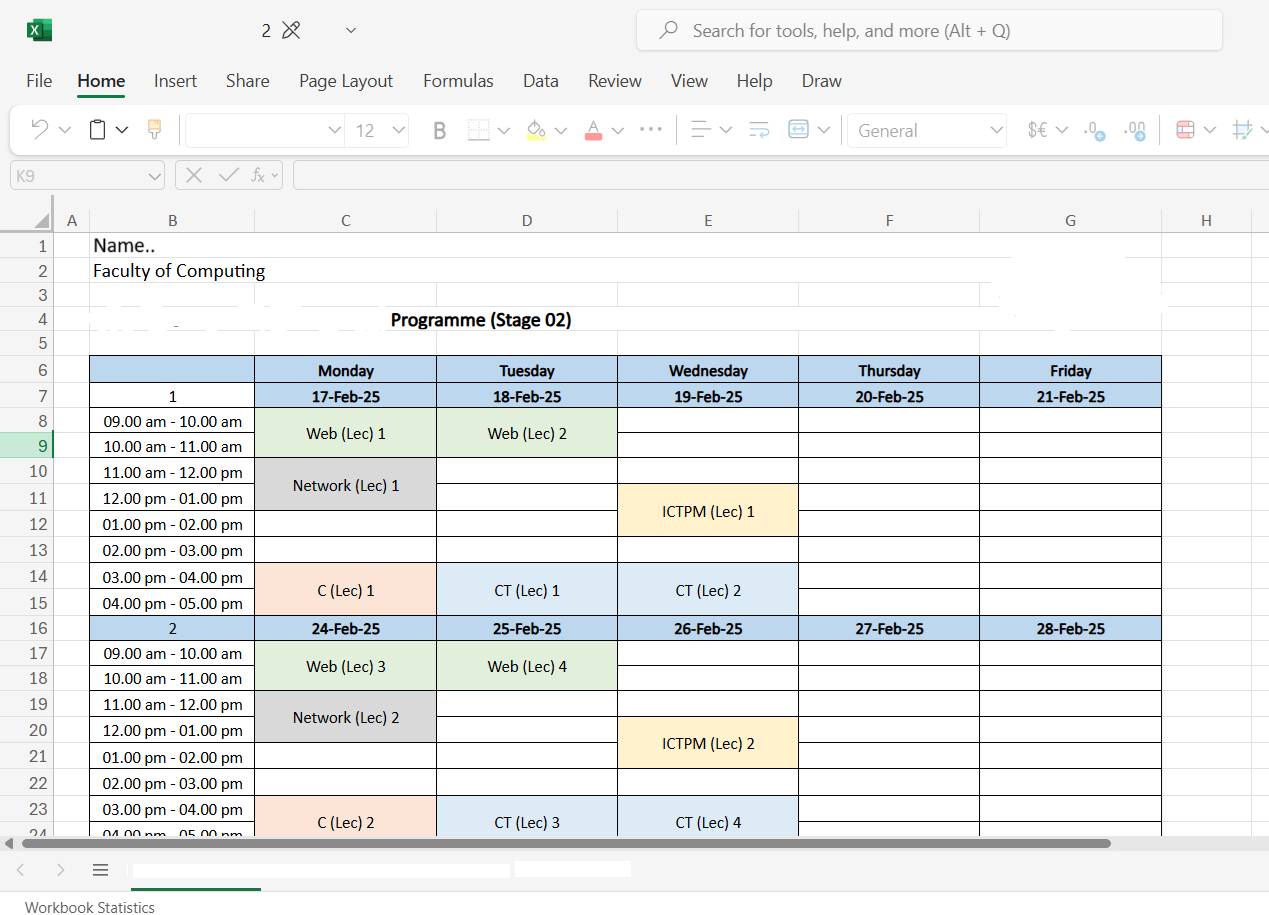
The Excel file with the timetable
This script is posted on Github, https://github.com/Posandu/nsbm-timetable. You can see all the code and how it works. It’s specifically deigned for NSBM timetables but might be useful as a starting point if you’re building your own. An explanation of how it works is below.
The tech stack
At first, I had no idea of what I was going to use so I defaulted to using JavaScript like I always do. The Bun runtime is very fast and I’ve been using it for a while now.
For parsing the Excel file, I used the ExcelJS library. There were a few excel parsing libraries in npm but this seemed to have the easiest API. After parsing the Excel file, we can generate an .ical file. It’s a simple file format that allows to add events and Google Calendar supports importing them via an URL.
The script is called every morning via a Github Actions cron job. Then, it publishes the updated .ical file to a secret Github Gist. Which Google Calendar fetches periodically and adds/updates events in my Calendar.
Parsing the Excel file
This is the most challenging and time-consuming part I had to deal with. As I mentioned in the beginning, the Excel file was hosted on Sharepoint - which is a part of Microsoft 365. Here’s how it looks after visiting the link on a browser.
I first needed a way to download the excel file locally. After a few minutes of Googling and help from friends, I found this StackOverflow answer https://stackoverflow.com/a/60992340. It was exactly what I needed. I used ChatGPT to help create a simple shell script to download the Excel file with wget and save it.
if [ -z "$CAL_LINK_24_3_FDN" ]; then
    echo "Error: CAL_LINK_24_3_FDN environment variable is not set"
    exit 1
fi

mkdir -p ./downloaded

wget -qO ./downloaded/24.3-fdn.xlsx "$CAL_LINK_24_3_FDN"
Now that I have the file locally, I need to parse it. Each Excel cell has an “address”. This allows you to reference cells easily - instead of using some weird array tricks like row[0][1], cell addresses allows to use “A0”. Even though I need to parse the events using those array tricks, I can use addresses to get static values easily.
So the first step was to make a config with all the static values which are unique to the timetable. This allows me to add future NSBM timetables since most of them follow a similar format.
const CONFIGS = [
	{
		name: '24.3-fdn',
		worksheet: '24.3 & 24.4 FDN',
		timeTableStart: 7,
		dataIndex: 2,
		summaryCell: 'B4',
		timeSlotRegex: /(\d+)\.(\d+) ([a-zA-Z]+)\s?-\s?/,
		id: process.env.GIST_ID_24_3_FDN
	}
];timeTableStart- The row number where the timetable starts (Excluding the name of the week).dataIndex- The column number where the days start.summaryCell- The cell ID of the name of the program.
Next step is to parse the events and store them in an array. We can use an array to store a list of weeks and inside each week, there’s an array of the events of the 5 days.
let weeks: {
start: Date;
end: Date;
name: string;
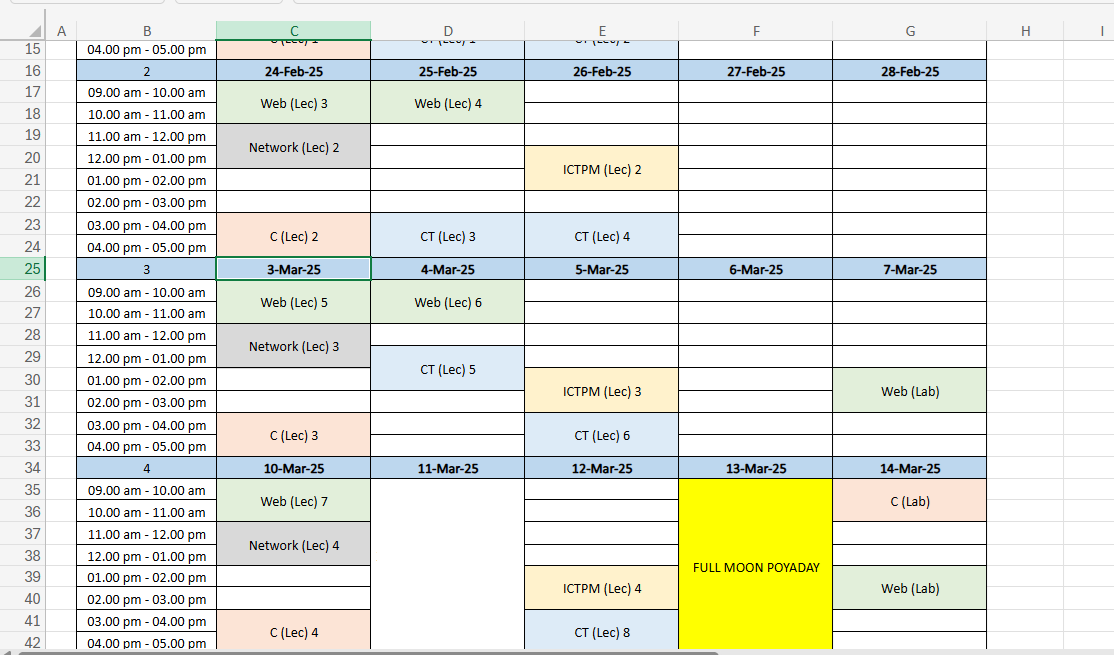
}[][] = [];So now that’s ready, we need to find a way to parse the events. This is the most tricky part since this isn’t some random HTML table. After staring at the Excel file for a bit, I noticed some patterns.
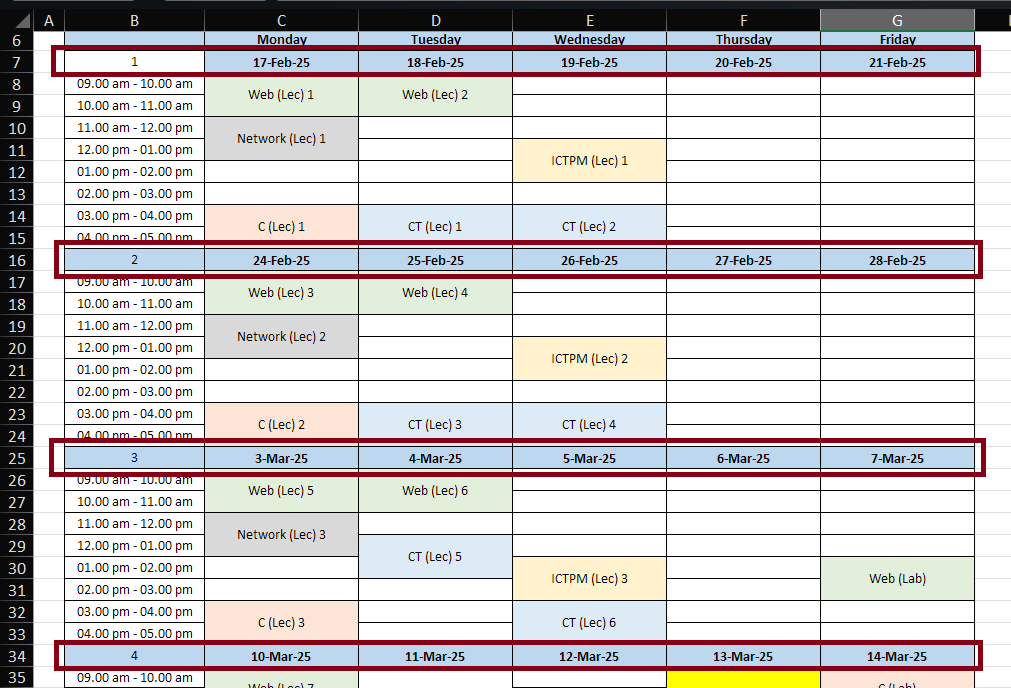
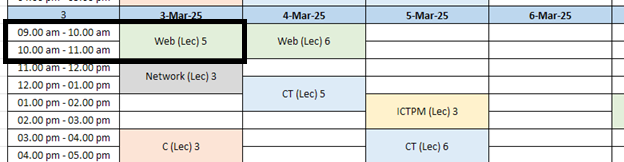
Each week has exactly 9 rows and every week has a week number followed by the days of the week. We can use this information to identify each week. We go through each row one by one, check if there’s a week number and a list of dates to the right. If the condition matches, we found a new week. The below image shows the rows that match the above condition.
Now we can parse each row one by one with a while loop.
let row = config.timeTableStart;

while (true) {
	/* parsing logic goes here */

	row++;
}
Getting the week dates
It seemed simple at first, the week date is just a number right?
But I realized that I was wrong after getting undefined on some week dates instead of the date when parsing them. In Excel, forumlas allow to derive values based on other cell values so, there were places where week dates were just formulas instead of just dates!
Thankfully, the XLSX library had an object to get the formula result inside a cell value. I had to make a function for that.
function getDateFromValue(val: CellValue): Date | undefined {
	if (val instanceof Date) return val;
	if (typeof val === 'object' && val !== null) {
		if ((val as CellSharedFormulaValue)['result'] instanceof Date) {
			return (val as CellSharedFormulaValue)['result'] as Date;
		}
	}
	return undefined;
}

function isDate(val: CellValue): val is Date {
	return getDateFromValue(val) !== undefined;
}
We can now parse the week dates and add them to the lastWeek array.
let lastWeek: Date[] = []; // the week we found at last
while (true) {
const currentRow = worksheet.getRow(row);
/* make sure there's a week number */
if (!currentRow.getCell(config.dataIndex).text.match(/\d|\s/g)) break;
/* date check */
if (isDate(currentRow.getCell('C').value)) {
lastWeek = [];
weeks.push([]);
currentRow.eachCell((cell, i) => {
if (isDate(cell.value)) lastWeek.push(getDateFromValue(cell.value)!);
});
//...
}
//...
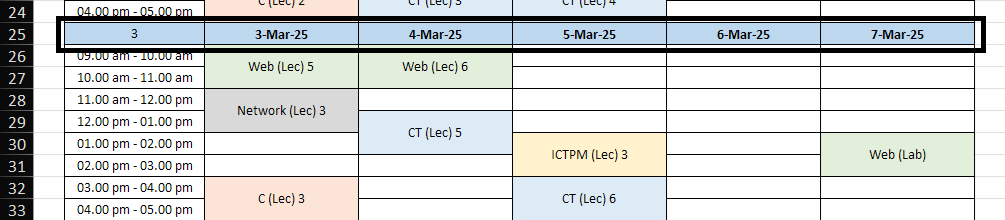
}Nice! Now we have a working method to identify each week easily. The next step is to get the events inside each day of the week. If we look at the Excel file again, we can see that each time range has its own row. This makes things easier since we’re already reading every row.
Here’s what we’re currently doing,
- Go through each row.
- If the first column is a number, get all the week dates and add it to the
lastWeekarray. - Or else, if it matches the time range regex, add those events to the corresponding day in the array. - this is what we need to do next.
A simple regex like /(\d+)\.(\d+) ([a-zA-Z]+)\s?-\s?(\d+)\.(\d+) ([a-zA-Z]+)/ (mentioned in the config) allows to match 09.00 am - 10.00 am and get the starting and ending times.
while (true) {
	//...

	/**
	 * Group - 09.00 am - 10.00 am
	 *         ^  ^  ^     ^ ^  ^
	 *         1  2  3     4 5  6
	 */
	const match = currentRow.getCell('B').text.match(config.timeSlotRegex) as
		| [string, number, number, string, number, number, string]
		| null;

	/* we found a time range! */
	if (match) {
		//...
	}

	//...
}
And here’s where the last added week becomes useful. Since the events have no way to get the “date”, we can use the that week’s date and change the time accordingly.
if (match) {
	const week = weeks[weeks.length - 1];

	if (!week) throw new Error('Week not found');

	/* the 5 columns in front of the time-range are the events on different dates */
	for (let day = 0; day < 5; day++) {
		const cell = currentRow.getCell(config.dataIndex + 1 + day).text.trim();

		/* the last added week allows to get the date */
		const dateObj = lastWeek[day];

		if (!dateObj) throw new Error('No date found');

		// no event
		if (!cell) continue;

		const start = new Date();
		const end = new Date();

		start.setTime(dateObj.getTime());
		end.setTime(dateObj.getTime());

		start.setHours(getHours(+match[1], match[3]), 0, 0);
		end.setHours(getHours(+match[4], match[6]), 0, 0);

		week.push({
			name: cell,
			start,
			end
		});
	}
}
If we run what we have so far, the weeks array is going to be something like this.
// ...
[
	{
		"name": "Web (Lec) 5",
		"start": "2025-03-03T03:30:00.000Z",
		"end": "2025-03-03T04:30:00.000Z"
	},
	{
		"name": "Web (Lec) 6",
		"start": "2025-03-04T03:30:00.000Z",
		"end": "2025-03-04T04:30:00.000Z"
	},
	{
		"name": "Web (Lec) 5",
		"start": "2025-03-03T04:30:00.000Z",
		"end": "2025-03-03T05:30:00.000Z"
	},
	{
		"name": "Web (Lec) 6",
		"start": "2025-03-04T04:30:00.000Z",
		"end": "2025-03-04T05:30:00.000Z"
	}
	// ...
]


// ...
Handling merged cells
As you have noticed, every event occupies more than 1 rows so, we need to combine 2 time ranges into 1 time as well.
Fortunately, the XLSX library handles merged cells well. So even if we get the content for the 26th and 27th row in the column, we still get the same output, which is “Web (Lec) 5”. This can be seen in the output array I posted above where there are 2 events with the same name. We can use a merge function after that to fix them and merge events.
Also, there are some events that occupy the whole day.
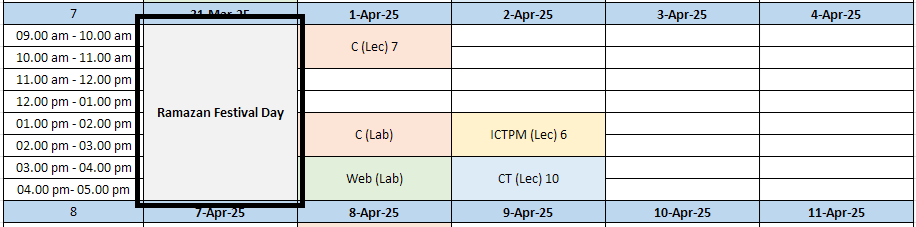
A simple check that if all the events in the same day have the same name will be enough for detecting whole-day events since they occupy 5 rows. Whole day events will be from 9AM-5PM since its the time the uni is open.
const sameday = week.filter((e) => e.start.getDay() === curr.start.getDay());

if (sameday.length > 2 && sameday.every((e) => e.name === curr.name)) {
	i += sameday.length - 1;

	const end = new Date(curr.end.getTime());

	end.setHours(17, 0, 0);

	merged.push({
		name: curr.name,
		start: curr.start,
		end
	});

	continue;
}
After combining everything, we get the below code for merging events.
weeks = weeks.map((weekI) => {
	const merge = (week: typeof weekI) => {
		const sorted = week.sort((a, b) => a.start.getTime() - b.start.getTime());
		const merged: typeof week = [];

		for (let i = 0; i < sorted.length; i++) {
			const curr = sorted[i]!;
			const next = sorted[i + 1];

			/**
			 * if all the events in the same day have the same title, merge
			 */
			const sameday = week.filter((e) => e.start.getDay() === curr.start.getDay());

			if (sameday.length > 2 && sameday.every((e) => e.name === curr.name)) {
				i += sameday.length - 1;

				const end = new Date(curr.end.getTime());

				end.setHours(17, 0, 0);

				merged.push({
					name: curr.name,
					start: curr.start,
					end
				});

				continue;
			}

			/*
				we're currently merging only if 2 events are next to each other
			*/
			if (next && curr.name === next.name && curr.end.getTime() === next.start.getTime()) {
				curr.end = next.end;
			}

			merged.push(curr);
		}

		return merged;
	};

	return merge(weekI);
});
If we run the script again and see the output, we can see how it works perfectly and how duplicate events are merged into one!
[
	{
		"name": "C (Lec) 3",
		"start": "2025-03-03T09:30:00.000Z",
		"end": "2025-03-03T11:30:00.000Z"
	},

	{
		"name": "Web (Lec) 6",
		"start": "2025-03-04T03:30:00.000Z",
		"end": "2025-03-04T05:30:00.000Z"
	},
	{
		"name": "CT (Lec) 5",
		"start": "2025-03-04T06:30:00.000Z",
		"end": "2025-03-04T08:30:00.000Z"
	}
	// ...
]


// ...
Creating the events
Now that the challenging parsing part is done, we need to create the events in the Icalendar format. I found another npm library called ical-generator which allows to create events easily. Using that library was simple instead of writing my own.
const calendar = ical({ name: 'NSBM Timetable', timezone: 'Asia/Colombo' });

for (const week of weeks) {
	for (const subject of week) {
		calendar.createEvent({
			start: subject.start,
			end: subject.end,
			summary: isEvent(subject.name) ? capitalizeEachWord(subject.name) : subject.name
		});
	}
}
Syncing the events with Google Calendar
The final step is to make it sync with my Google Calendar. Google Calendar offers a feature that allows to import .ical files by providing an URL so I can use that (Other Calendars > Click + > From URL). However, I needed a way to host the exported .ical file.
My initial thought was just to push the .ical file to the Github repo but that would mean anyone could see my schedule. Making the repo private will block the Google Calendar crawler. So I just used Github Gist.
Github Gists are private by default but, you can access the raw content of a file if you have the ID. This allows anyone with the ID to view the content. Also, we can use the Github API to update the file automatically. Perfect!
So I used the Github API to update the Github Gist after generating the .ical file.
const octokit = new Octokit({
auth: process.env.TOKEN
});
await octokit.request('PATCH /gists/{gist_id}', {
gist_id: config.id,
files: {
[config.name + '.ics']: {
content: calendar.toString()
}
},
headers: {
'X-GitHub-Api-Version': '2022-11-28'
}
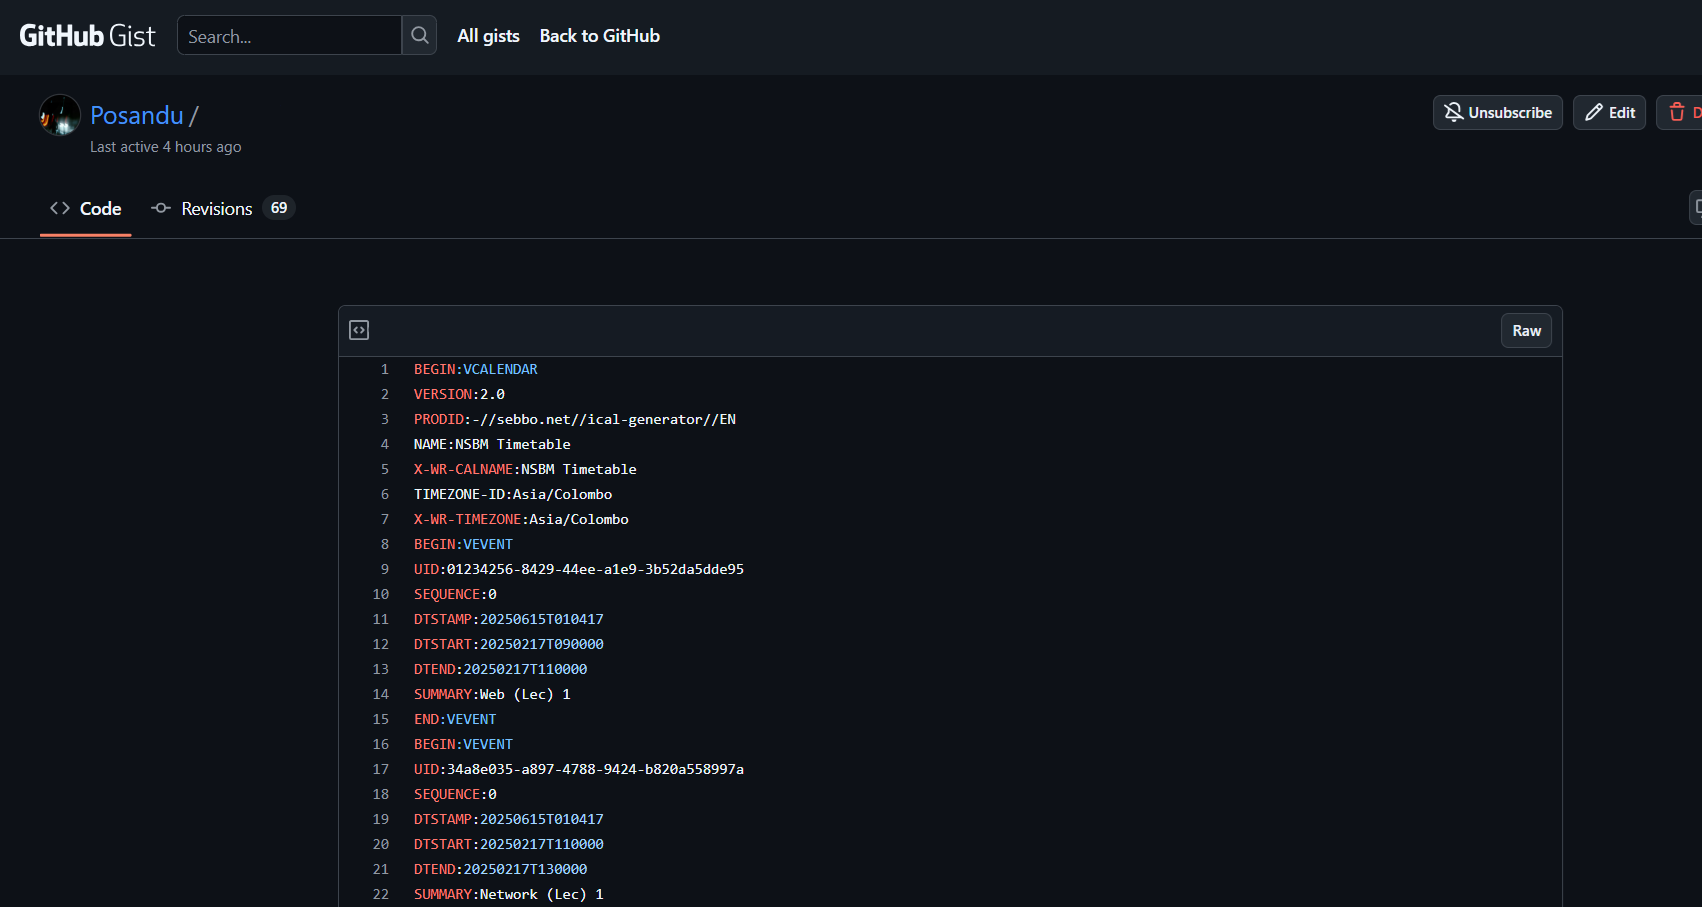
});After running the script, we can see the updated file on Github Gist.
By changing the URL to have the correct Gist ID, we can get the raw contents of the file.
https://gist.githubusercontent.com/Posandu/??????/raw/??????.icsNow I can import the ical file to my Google Calendar!
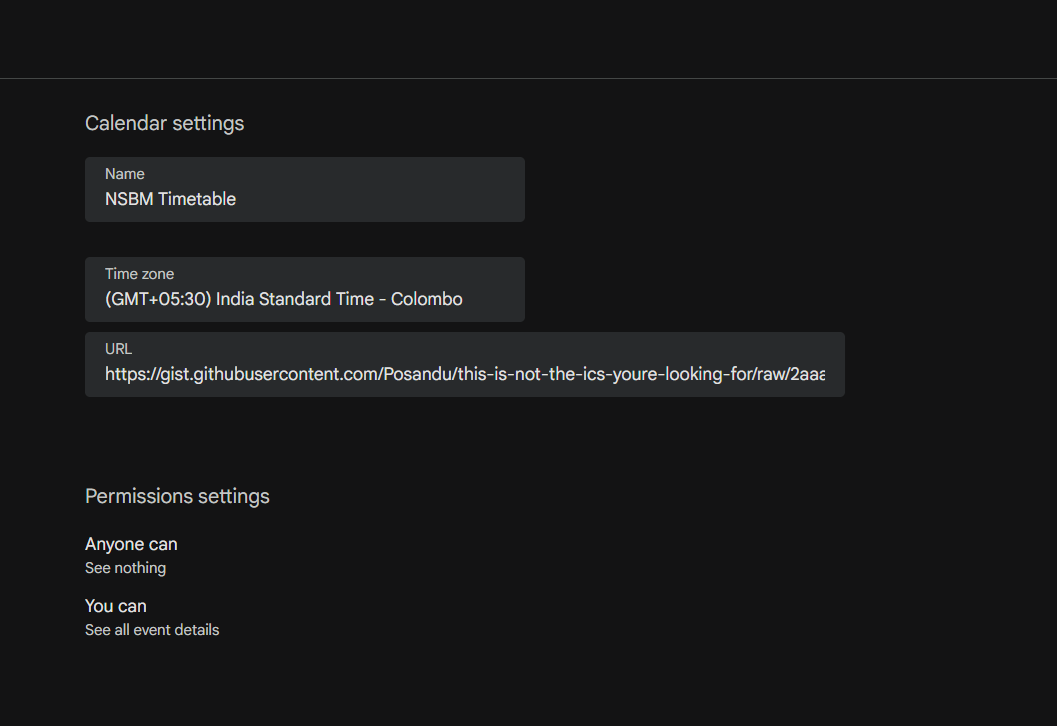
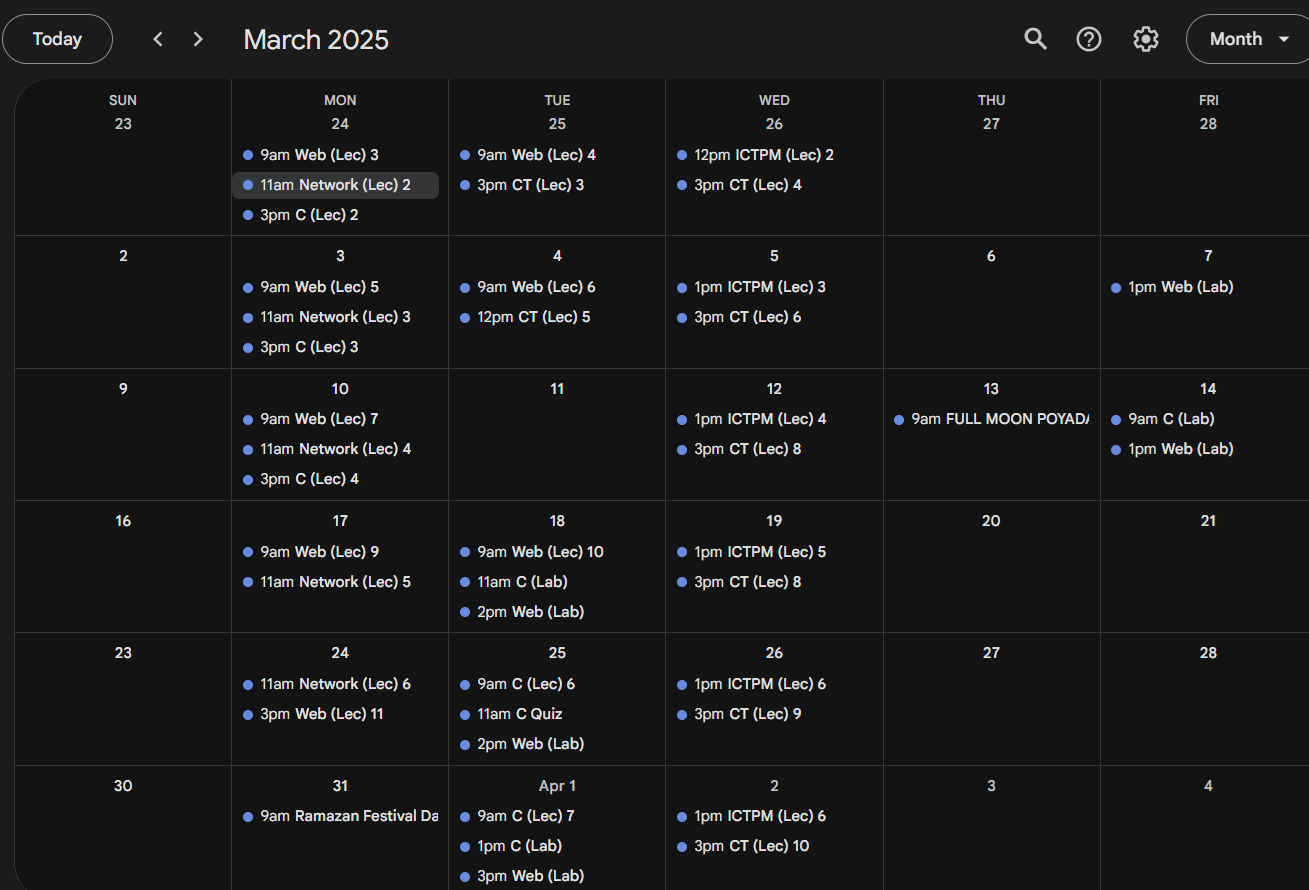
So if we open the Google Calendar, we can see all the events synced as expected. 🥳
But we still have 1 more step to do, this script only updates the Calendar when we run it manually. This can be solved by using cron job in a Github Action. I made a Github Action file which runs daily at 12:00 AM.
on:
  push:
    branches:
      - main
  schedule:
    - cron: '0 0 * * *'

jobs:
  update_calenders:
    environment: main
    runs-on: ubuntu-latest
    permissions:
      contents: write

    steps:
      - uses: actions/checkout@v4

      - name: Setup Bun
        uses: oven-sh/setup-bun@v2

      - run: bun install

      - name: Update Calendars
        env:
          CAL_LINK_24_3_FDN: ${{ secrets.CAL_LINK_24_3_FDN }}
        run: bash ./scripts/download.sh

      - run: bun run index.ts
        env:
          TOKEN: ${{ secrets.TOKEN }}
          GIST_ID_24_3_FDN: ${{ secrets.GIST_ID_24_3_FDN }}
Now everything works flawlessly!
The end
This was a fun thing to do on a weekend since I was bored. I learned a few new stuff while doing this so this wasn’t a failed project even if it wouldn’t have worked.
Using Google Calendar instead of the Excel file allowed me to do some other cool stuff as well, for example the widget on the home screen of my phone was a game-changer for me.

Now I can look at my home screen while everyone else is taking 1 or 2 minutes opening at the Excel file and looking for the class. 😅
Also, the script usually takes less than 10s to update per each run so it’s pretty efficient too! There are about 27 weeks of events to process.
I might need to update this script in the future if the timetable changes the format in a significant way, but I’ve been using this for a few months and there were no issues.
Thanks for reading! You can visit my Github profile for more interesting projects.
